Lua Scripting Tutorial, Part 2
Overview
In this tutorial you will learn how to take an existing template in Core and use scripts to change it.
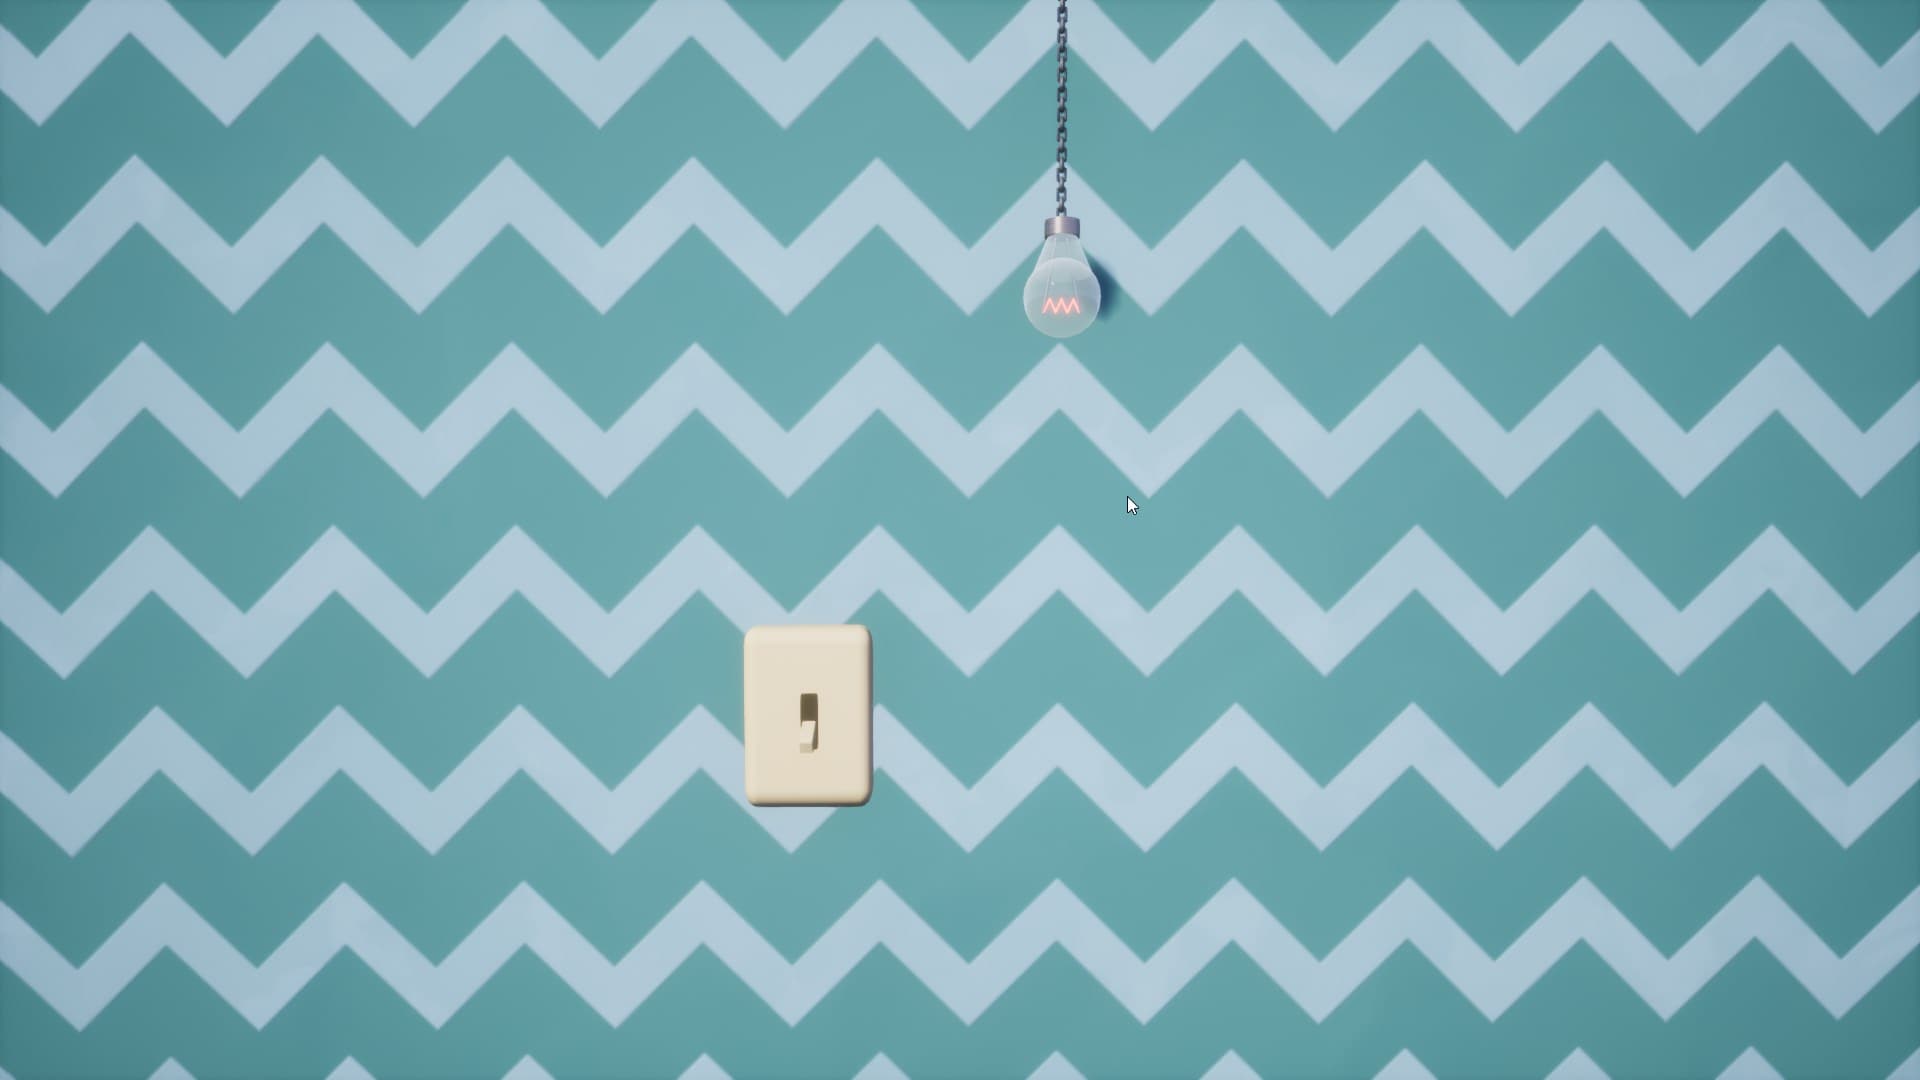
We are going to create something that brightens every room: a light switch!
This involves turning on and off a light switch to illuminate a light bulb.
Setting Up the Template
Download the Template
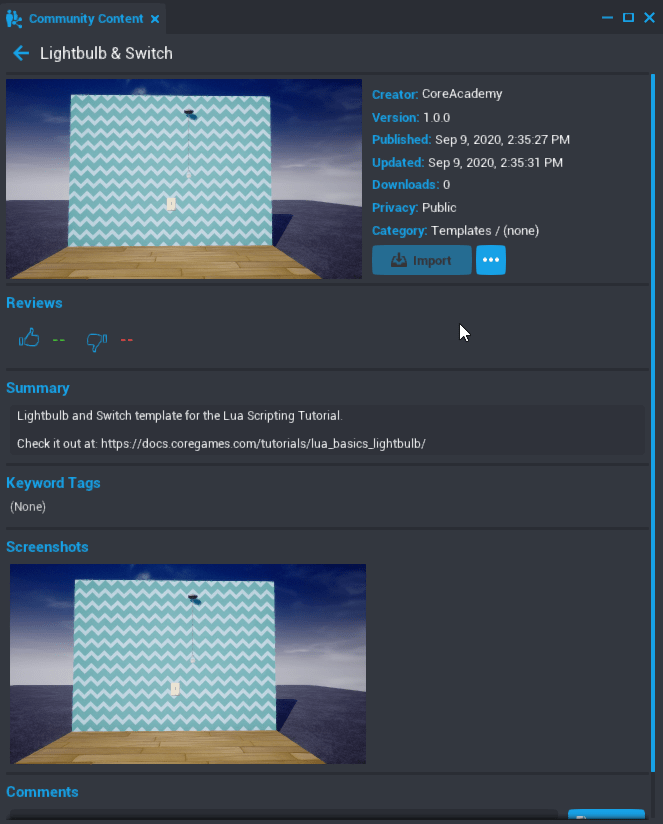
- Open the Community Content window in the Core Editor.
- User the search bar to search for
switchand find Lightbulb & Switch (by CoreAcademy) - Click Import to download the template.
Note
You can also use the original Light Bulb & Switch template by Tobs. The CoreAcademy version has just been updated to use newer Core Content.
Open the Template
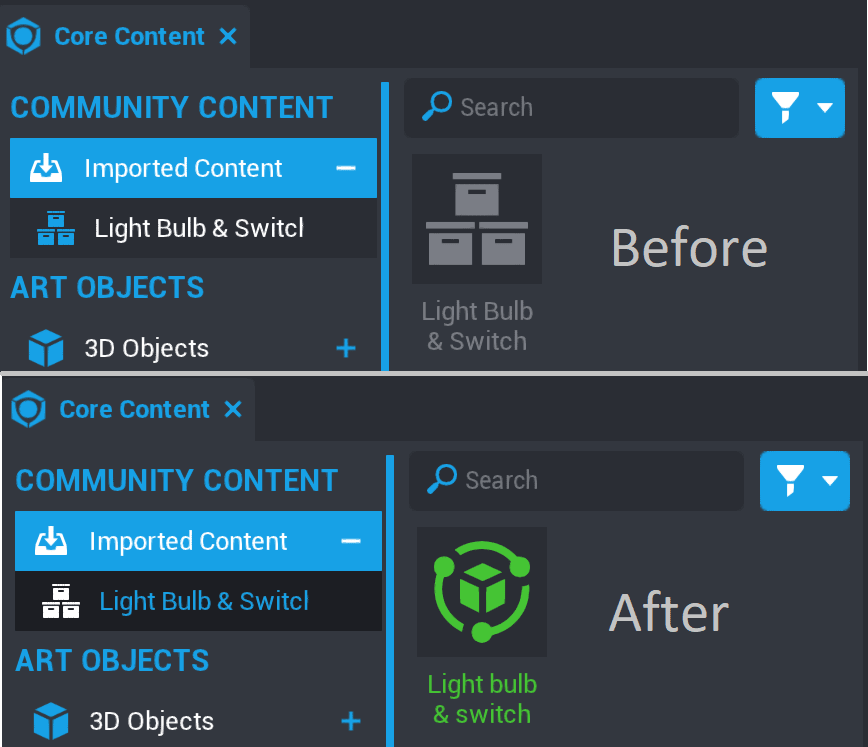
- In the Core Content window, find the Imported Content section and Light Bulb & Switch
 .
. - Double-click the icon to open it. You should now see the green
 icon.
icon.
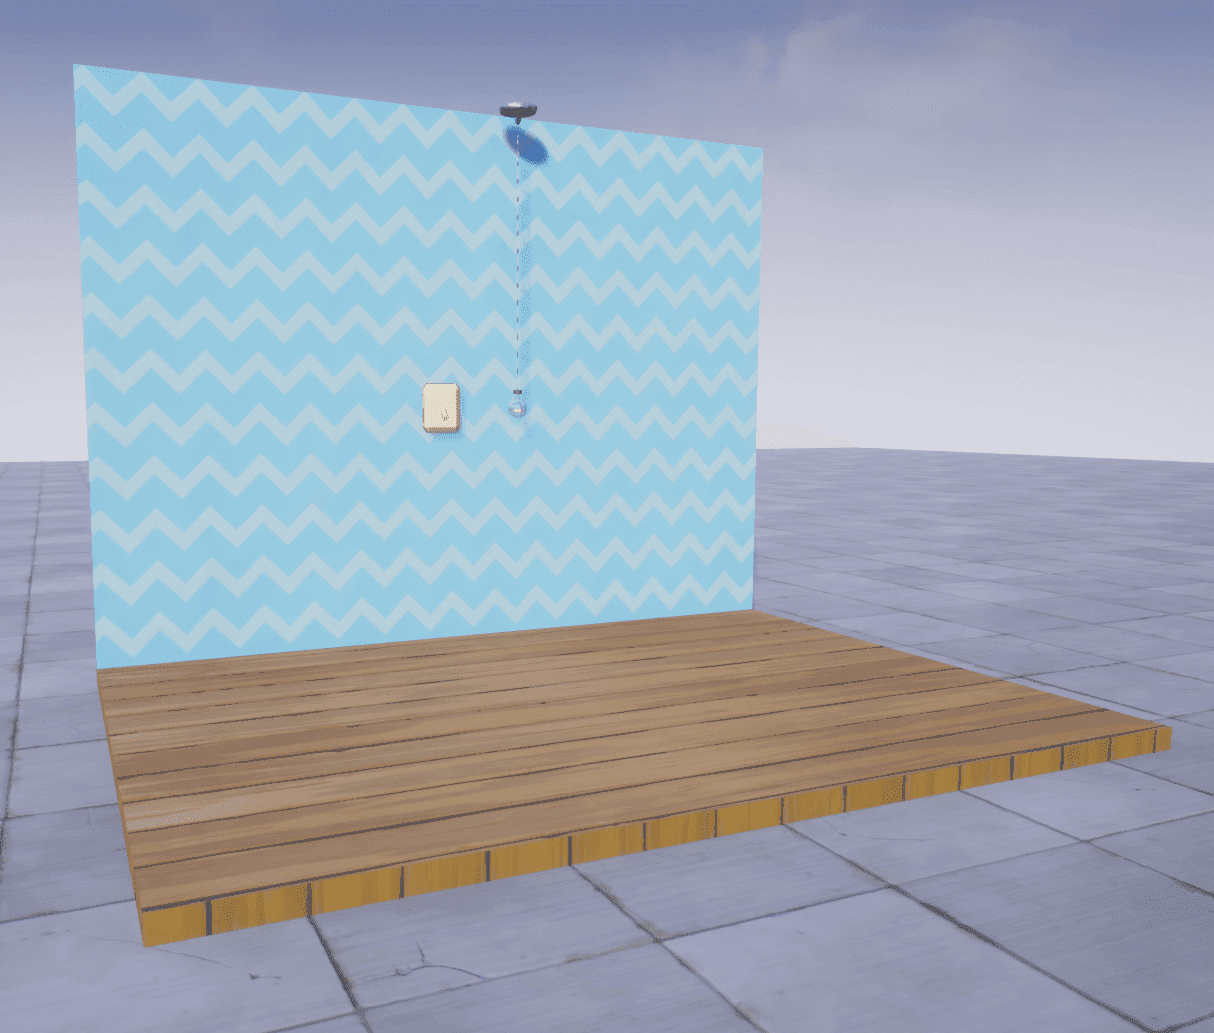
- Click on the Light Bulb & Switch package and drag it into your game by dragging it into the Main Viewport.
- Make sure Group Selection Mode is turned on to select the entire template. You can use the C key to switch between this and Object Selection Mode.
- Reposition the wall and lightbulb where you want it using the transform tools in the top toolbar. To learn more about moving objects, check out the Intro to the Editor.
Note
If you click on the wall, or part of the scene, this will not select the entire template. Click the Lightbulb and Switch folder in the Hierarchy to move, resize, or rotate it.
Create a New Script
-
To get started making this light switch work, we're going to create a new script by clicking the
 Create Script button in the toolbar at the top of the editor.
 -
Name this script
LightToggleScript. -
Save the script by pressing Ctrl+S.
Info
It's important to save your scripts often so you don't lose work in the event of a problem. Use Ctrl+Shift+S to save all scripts when you save your project.
Deinstance the Lightbulb & Switch Template
To make changes to the template, we first need to deinstance it.
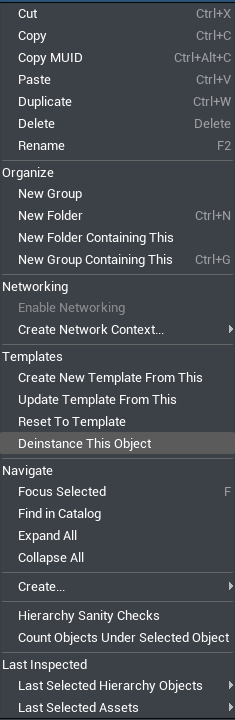
Right click on the Light bulb & Switch template in the Hierarchy and select Deinstance This Object.
The template and objects in the template will change from blue to teal. This color change means that the template is now editable.
Deinstancing allows you to make changes to a particular copy of a template without changing the template itself. You can learn more about how this works in our template reference.
Add the Script to the Template
- Open the contents of the Light bulb & switch template by clicking the drop down arrow to the left of its name in the Hierarchy.
- Open up the Light switch folder to find a folder inside called Switch.
- Drag the
LightToggleScriptfrom Project Content tab into the Switch group folder.
Writing the Code
Define the Switch
We want our light switch to function just like a real one: the switch will point up or down depending on whether the light is turned on or off.
First you will need to tell the script which object in the scene is the switch, so that it knows what to rotate. You will create a variable that defines what the switch is.
To move the switch, we need a way to talk about the specific object from the game space in code.
Type the following into Line 1 of LightToggleScript:
local switch = script.parent
localis a keyword that indicates that you are making a variable. We use the term local here because it will only be accessible from this script rather than being accessible from external scripts, or globally.switchis the variable name. You can name it anything but it's important to create variables with self-explanatory names so our scripts are easy to read and understand.script.parentrefers to the script's parent - the group or folder the script is placed in. In this case it refers to the Switch group. If you wanted to reference the entire Light Switch & Bulb template, for example, you would usescript.parent.parent.parent.
Finding the Switch's Rotation
To figure out how to rotate the switch, you will move it around in game, and take note of the Rotation displayed in the switch's Properties menu.
Select the Switch
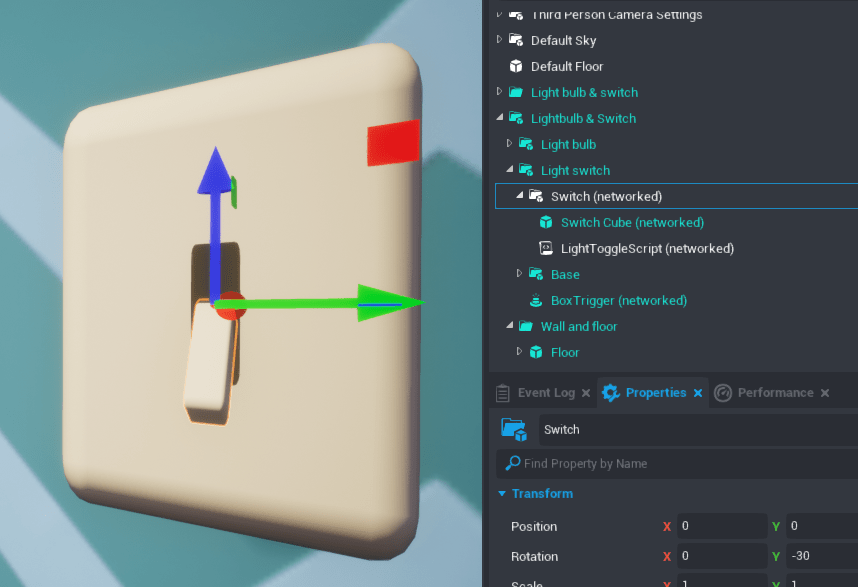
Click on the Switch (networked) group in the Hierarchy to select it. Note that you will need to select the entire group, not just the cube inside of it, because that is what switch variable refers to.
Find the Switch's Current Rotation
-
Turn on Rotation mode by clicking the
 button, or pressing E
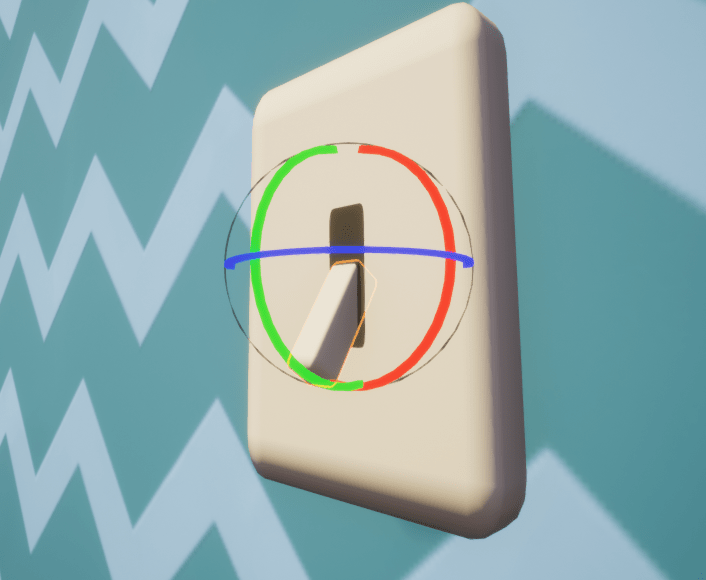
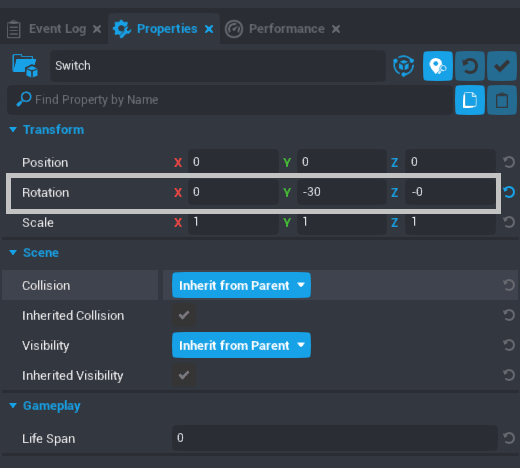
-
Look at the Properties window. In the Transform section, you should see a property called Rotation, with an X, Y, and Z value.
Rotate the Switch in the Editor
To figure out where the switch needs to be, we'll reposition it using the Rotate tool, and take note of final rotation that we want to change it to.
- Click the green ring on the Rotate tool to move the switch up and down, and take note of the change in the Y value of the switch's Rotation property.
- Press Ctrl+Z to return the switch to its original position.
Your rotations may be different, but will most likely look like this:
| On / Off | X | Y | Z |
|---|---|---|---|
| On | -0 | -60 | 0 |
| Off | -180 | -60 | 180 |
Scripting the Rotation
Create Variables for Each Rotation
Now that you know the rotations of the switch for "on" and "off", you can save them as variables. On the next line of your LightToggleScript add these lines:
local onRotation = Rotation.New(0, -60, -0)
local offRotation = Rotation.New(-180, -60, 180)
Rotation.Newmeans we are telling the script to rotate our object to a new set of coordinates.(0, 60, 0)are the x, y, and z coordinates (respectively) of where we want our switch to rotate to. We want to rotate our switch up along the y-axis by 90 degrees.
Note
You will almost always use Rotation.New when rotating an object, but there is also a predefined Rotation called Rotation.ZERO which will rotate the object to 0, 0, 0.
Learn more about Rotations on the Core API page.
Make the Switch Move with a Script
Next you will rotate the switch. On a new line, type:
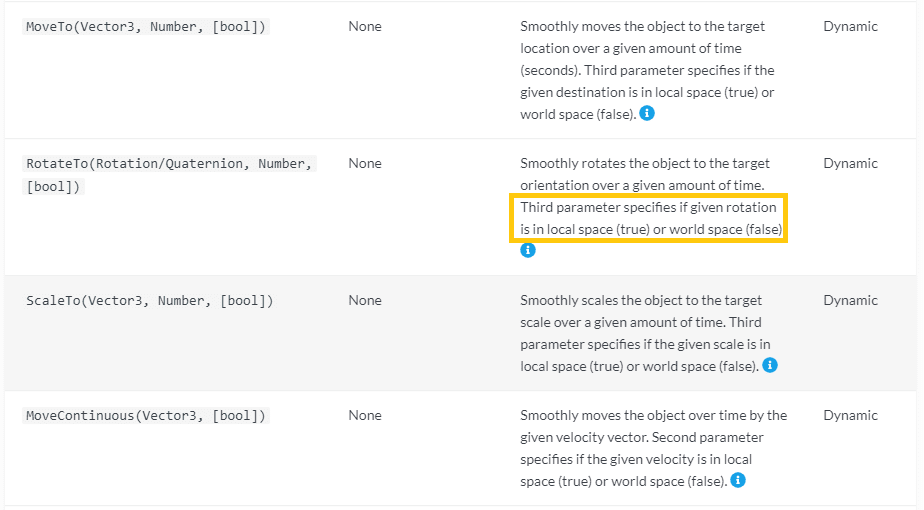
switch:RotateTo(onRotation, 2)
switchtells the script to rotate the object attached to this variable.RotateTois an function that tells Core we want to rotate an object.2is the time it should take to complete the rotation.
The script should now look like this:
local switch = script.parent

local onRotation = Rotation.New(0, -60, -0)
local offRotation = Rotation.New(-180, -60, 180)

switch:RotateTo(onRotation, 2)
Test out the Switch
Let's press Play and see how our switch moves!

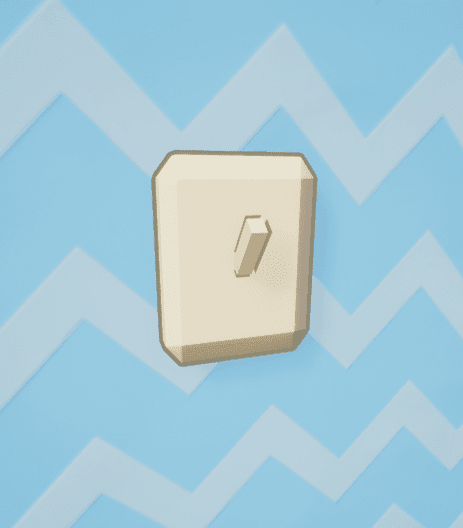
Unfortunately that didn't quite work out the way we wanted... Depending on where in the scene you placed your light switch, it might look like this image, where the switch rotated sideways instead of up.
Change the Rotation to Local Space
To get the script to rotate the switch the way we want, only along the y-axis, it needs to know to move relative to its original position. Luckily in this case the RotateTo() function has an optional parameter that we can add to specify that we want the rotation to happen relative to its own space.
Change the last line to look like this:
switch:RotateTo(onRotation, 2, true)
By adding true to the end of the parameters for RotateTo(), it moves in local space. If we were to enter false instead, or enter nothing like we did the first time, it will move in world space. World space is relative to nothing but the world itself, as if it was at the root of the Hierarchy.
Press Play and test it out!
Letting Players Move the Light Switch
So far, you have made a script that moves the lightswitch, but this happens automatically and immediately when the game starts. Next, you will make the players able to flip the switch to turn on and off our light.
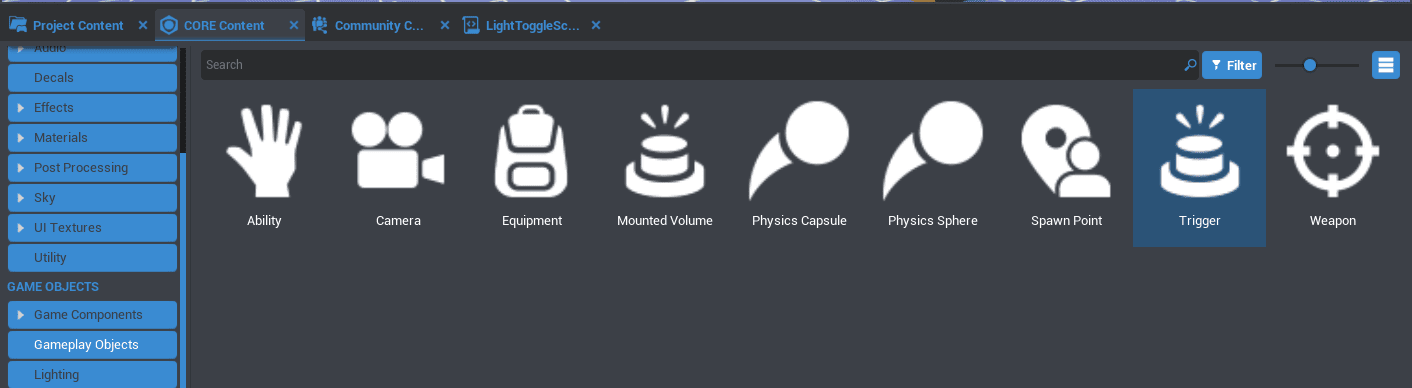
Using a Trigger
To create in-game interactions, use a trigger. A trigger defines the area and checks if any player enters, leaves, or presses the Interact key inside of it.
The Lightswitch & Bulb template includes a trigger, but you can add trigger objects to a project from the Core Content window, in the Gameplay Objects section.
- In the Hierarchy tab, select the "BoxTrigger" object within the Light switch folder. and press F. This will move the Main Viewport view to focus on the trigger.
- Notice the size, shape, and position of the trigger. The player will have to stand inside the box to be able to activate the trigger.
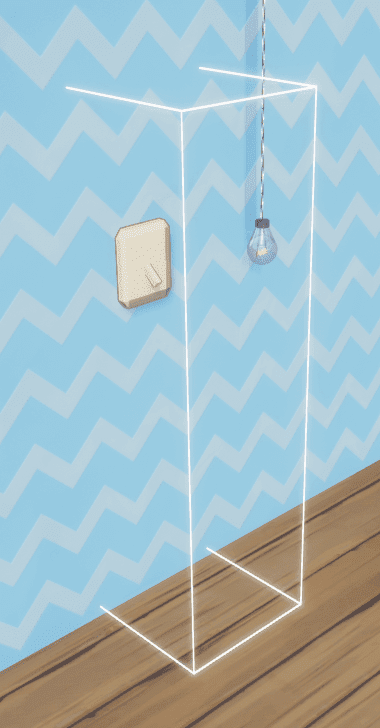
If you can't see a the trigger, press V to make it visible!
Make the Trigger Interactable

- Look at the Properties window with the trigger selected. Under the Gameplay section there is a property called Interactable. Check the box to make the trigger interactable.
- Find the Interaction Label property, and change it to something like "Turn on Light"
- Press Play to start a preview, and walk up to the lightswitch. You should see a message
Script the Interaction
Now that we know what a trigger is and where it is set up, we can get back to our script. We need to tell the script what our trigger is and what should happen when the player interacts with it.
Add this line of code to the second line of your script, after the switch variable:
local switchTrigger = switch:FindChildByName("Trigger")
switchTriggeris the name for our trigger variable.switch:FindChildByName("Trigger")looks for an object that is a child of the switch, and has the name "Trigger" in the Hierarchy.
Your script should look like this:
local switch = script.parent
local switchTrigger = switch:FindChildByName("Trigger")

local onRotation = Rotation.New(0, -60, -0)
local offRotation = Rotation.New(-180, -60, 180)

switch:RotateTo(onRotation, 2, true)
Test the Trigger Reference
Getting in the habit of testing references will help you find bugs in code before they become a problem.
Add this code on the third line of your script, after the line that makes the switchTrigger variable:
print(switchTrigger)
Press Play to start a preview, and see what prints in the Event Log window. You should see Trigger followed by the unique ID for your trigger object.
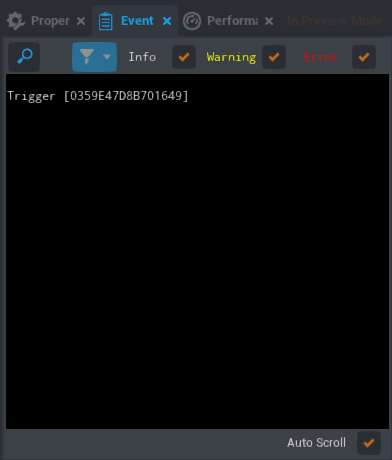
If you see nil instead, the most common reason is that your trigger is not in the same folder as the script. Look in your Hierarchy to check the following:
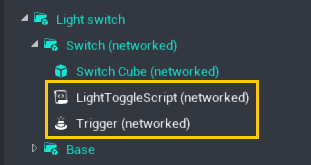
- The trigger is in the Switch (networked) folder.
- The trigger and LightToggleScript are in the same folder.
- The trigger's name in the Hierarchy is Trigger.
Once you know that the switchTrigger variable is pointing to the trigger in your game, you can delete the print line.
Create a Function for the Trigger
Now that the script knows which object we are using as a trigger, we need to define what happens when we interact with the trigger.
After your rotation statement, type:
function OnSwitchInteraction()

end
- A
functionis a set of actions that the script carries out every time the function is referenced in the script. OnSwitchInteractionis the name of the function.endtells the script the function is over.
This function will define what happens when the player interacts with the trigger.
Move the Switch Code into the Function
Eventually we want the switch to flip up and down when the player interacts with it, turning the light on and off. For now we'll just place our rotate statement inside it, which is just the switch turning down.
Cut and paste the RotateTo statement into our onInteraction function.
It should now look like this:
local switch = script.parent
local switchTrigger = switch:FindChildByName("Trigger")

local onRotation = Rotation.New(0, -60, -0)
local offRotation = Rotation.New(-180, -60, 180)


local function OnSwitchInteraction()
    switch:RotateTo(onRotation, 2, true)
end
Connect the Function to an Event
Lastly, you will need an event statement that tells the script to do the OnSwitchInteraction function when the player interacts with the trigger. At the end of your script type:
switchTrigger.interactedEvent:Connect(OnSwitchInteraction)
switchTriggeris the variable name of this trigger.interactedEvent:Connect()tells the script every time the player interacts with trigger to execute the function passed to theConnect()function.OnSwitchInteractionis the name of the function we are connecting.
Without this statement the script will never call the OnSwitchInteraction function.
Test Out the Script
Your script should now look like this:
local switch = script.parent
local switchTrigger = switch:FindChildByName("Trigger")

local onRotation = Rotation.New(0, -60, -0)
local offRotation = Rotation.New(-180, -60, 180)


local function OnSwitchInteraction()
    switch:RotateTo(onRotation, 2, true)
end

switchTrigger.interactedEvent:Connect(OnSwitchInteraction)
- Press Play to start a local preview.
- Walk up to the switch trigger and press F to interact with it. The switch should move up.
Note
Make sure that the trigger is Interactable if you do not see the option to press F pop up when you walk near it.
Speed Up the Movement
Now that the switch is working, you can speed up the rotation to look more like real light switch.
Change the 2 in the RotateTo() statement to 0.5. Now the switch will complete its rotation in 0.5 seconds.
switch:RotateTo(Rotation.New(0, 90, 0), .5, true)
Press Play to test out the improved movement speed.
Best Practices: Organizing Your Code
Organized code is easily read and understood. Using clear variable and function names, and adding comments to explain the purpose of sections of code will make your code easier to use by you in the future and by anyone else working with your scripts.
Programmers use comments to define and explain certain parts of their code. Add comments to your code to make the purpose of each section clear.
local switch = script.parent
local switchTrigger = switch:FindChildByName("Trigger")

-- Function to rotate the switch
local function OnSwitchInteraction()
    switch:RotateTo(Rotation.New(0, 90, 0), .5, true)
end

-- Connect the function to the trigger event
switchTrigger.interactedEvent:Connect(OnSwitchInteraction)
As your scripts get longer, these practices will make them easier to read and edit.
Turning on the Light
Your next project goal is to make the switch more function and have it spawn a light when players interact with it.
Add and Customize a Light
- Open the Lighting category of the Core Content window.
- Find the Point Light and drag it into the scene, on top of the lightbulb.
- With the Point Light selected in the Hierarchy, open the Properties Window.
- Lower the Intensity property until the light looks natural in your scene.
- In the Lighting section of Properties, check the box next to Advanced Settings to see more options to customize the light.
- Check the box for Use Temperature, and lower the Temperature property to create a warm glow color to the light.

Create a Networked Template
To spawn the light with the settings you just changed, it will need to be a template with networking enabled.
- Right click on the Point Light in the Hierarchy and select Enable Networking.
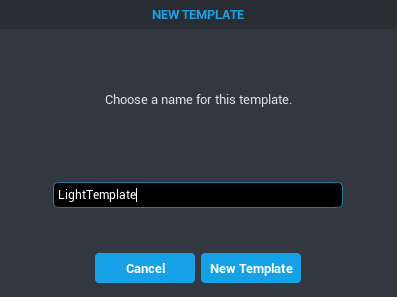
- Right click on the Point Light in the Hierarchy again and select Create New Template from This
- Name the template
LightTemplate.
You should now be able to find your template, and drag out new copies of it from the My Templates section of the Project Content window.
If you created the template without enabling networking, follow these steps to network it:
- Drag the template in into the Hierarchy (if it is not already there).
- Right click it and select Deinstance This Object.
- Right click it again and select Enable Networking.
- Right click it again and select Update Template From This.
- Delete the template from the Hierarchy.
Add the Template as a Custom Property of the Script
- Delete the LightTemplate from the Hierarchy. You don't need the light in the scene until a player turns on the light switch.
- Select the LightToggleScript in the Hierarchy and look at the Properties window.
- Look in the Project Content window for the LightTemplate.
- Drag the LightTemplate from Project Content into the Properties window of the LightToggleScript. This will add the template as a Custom Property of the script.

Add the Custom Property Variable to the Script
To be able to spawn the template, you will need a way to reference it in your script.

- Copy the code generated in the script's Properties. You can right click and select Select All to highlight all the text in the box.
- Open the LightToggleScript by double clicking it in the Hierarchy.
- On the first line, paste the code that you copied. It will look something like this:
local propLightTemplate = script:GetCustomPropert("LightTemplate")
propLightTemplateis the name of the variable. You can change this variable name, but will have to make sure that you change it in this tutorial every single placepropLightTemplateis used.script:GetCustomProperty("LightTemplate")tells the script to look for the script's custom property named LightTemplate which references the unique ID of theLightTemplateobject in Project Content.
Spawn the Template
Next you will tell the script to spawn lightTemplate when the player interacts with the switch.
In the OnSwitchInteraction() function under our RotateTo() statement, type:
World.SpawnAsset(propLightTemplate)
Worldis a collection of functions for finding objects in the world.SpawnAssetis a function that tells the script we'll be spawning a template or asset, and where to do so.propLightTemplateis the variable that references the light template which you defined earlier.
Your script should now look like this:
local propLightTemplate = script:GetCustomProperty("LightTemplate")

local switch = script.parent
local switchTrigger = switch:FindChildByName("Trigger")

local onRotation = Rotation.New(0, -60, -0)
local offRotation = Rotation.New(-180, -60, 180)

-- Function to rotate the switch
-- and spawn the light
local function OnSwitchInteraction()
    switch:RotateTo(onRotation, 0.5, true)
    World.SpawnAsset(propLightTemplate)
end
Th
-- Connect the function to the trigger event
switchTrigger.interactedEvent:Connect(OnSwitchInteraction)
Notice the updated comment to explain the new line in the OnSwitchInteraction function.
Test Spawning the Light
- Press Play and interact with the switch.
- Press Tab to pause gameplay and look in the Hierarchy. You should see LightTemplate at the bottom of the Hierarchy.
- Depending on where you are in the scene, you may even be able to see the light, which spawned at the origin of the project, at the coordinates (0, 0, 0)
Find the Correct Location for the Light
The next step is to change the position of the light when it spawns.
- Open the Light bulb group in the Hierarchy and find the group named Bulb.
- When you select Bulb, the gizmo should be positioned in the center of the lightbulb, so you can use it to determine the light's position.
Note
We could look up the global position of the Bulb and save it, the same way we found the rotation for the switch, but that would mean if you ever moved the lightbulb the light would not move with it. You would need to update the code yourself any time your move things. Instead we can find the bulb's position in the script and tell it to always spawn there, wherever that is.
Add these variables to the top of your script:
local bulb = World.FindObjectByName("Bulb")
local bulbPosition = bulb:GetWorldPosition()
bulbis the name of our variable referencing the objectFindObjectByNameis a Core function to find objects you wish to reference.bulbPositionis the name of our variable defining where we want the light placed.bulb:GetWorldPosition()gets the coordinates of the bulb object.
Improve the Light Location Code
The GetWorldPosition function is very powerful, but will break if you name anything else in your entire project Bulb. This is not a problem in an empty project, but could be if, for example, you built a whole house full of lights and bulbs.
Instead, you can look for the specific Bulb group that is part of this template, which will be the one that is a child of the template.
local lightBulbFolder = script:FindAncestorByName("Lightbulb & Switch")
local bulb = lightBulbFolder:FindDescendantByName("Bulb")
local bulbPosition = bulb:GetWorldPosition()
World.FindObjectByName still does the same thing, however.
Spawn the Light in the Correct Position
The next step is to update the SpawnAsset function to spawn the light wherever the Bulb is. Fortunately, World.SpawnAsset, takes extra optional parameters, which can be added in {}.
Find the SpawnAsset function and change it to include the bulbPosition as the position:
World.SpawnAsset(propLightTemplate, { position = bulbPosition })
Be sure to use a comma , between the inputs into the function!
Test the Light Spawn
By now, your script should look like this:
local lightBulbFolder = script:FindAncestorByName("Lightbulb & Switch")

local bulb = lightBulbFolder:FindDescendantByName("Bulb")
local bulbPosition = bulb:GetWorldPosition()

local propLightTemplate = script:GetCustomProperty("LightTemplate")

local switch = script.parent
local switchTrigger = switch:FindChildByName("Trigger")

local onRotation = Rotation.New(0, -60, -0)
local offRotation = Rotation.New(-180, -60, 180)

-- Function to rotate the switch
-- and spawn the light
local function OnSwitchInteraction()
    switch:RotateTo(onRotation, 0.5, true)
    World.SpawnAsset(propLightTemplate, {position = bulbPosition})
end

-- Connect the function to the trigger event
switchTrigger.interactedEvent:Connect(OnSwitchInteraction)
Press Play and test out the script by interacting with the light.
 Excellent!
You have turned on the light. If you keep interacting with the light switch you'll notice it continually spawns lights, making the light bulb brighter and brighter. Eventually, this can cause performance issues with thousands of networked objects.
Turning the Switch Off
Create a Boolean Variable
To turn the switch off again, you will create a variable that keeps track of whether the switch is on or off.
Add this new variable to the top of your script:
local lightIsOn = false
lightIsOnis the name of the variable we'll use to keep track of the switch being on and off.falseis a type of data called a Boolean. The starting state for the switch is false, because the light starts out off
Switch the Variable between True and False
Next, we need to tell the script to switch lightIsOn from false to true, when we turn on the light.
In the OnSwitchInteraction() function, type:
lightIsOn = not lightIsOn
Instead of just setting lightIsOn to true, this tells the script to change lightIsOn to whatever it is NOT set to.
If lightIsOn is false it sets it to true, and vice versa. In other words, the value is toggled to the opposite state.
Test the Variable Toggle
Test to see if the script correctly toggles between lightIsOn = false and lightIsOn = true when the player interacts with the switch.
Anywhere in our OnSwitchInteraction function type:
print(lightIsOn)
printtells the script to print to the Event Log window.-
lightIsOnis the variable that will be printing. -
Open up the Event Log window from the Window menu in the top bar.
- Keep this open and press Play.
- Press F to interact with the switch.
The Event Log should print true or false every time you interact with the light switch. You can delete the print statement now.
Create an If Statement
Now the script needs to know what to do specifically when the switch is on, and when it is not. An if statement will let you write code based on the state of other variables.
In the OnSwitchInteraction function, after lightIsOn = not lightIsOn type:
    if not lightIsOn then

    end
ifstatements are handy when you need a certain series of actions to happen when a certain set of conditions is true.not lightIsOnis the condition that must be met in order to execute the script inside our if statement.thensignifies the start of the code that will be performed if the conditions of theifstatement are met.endtells the script theifstatement is over.
Place the switch:RotateTo() statement and the World.SpawnAsset() function inside the if statement.
Your OnSwitchInteraction() function should now look like this:
local function OnSwitchInteraction()
    if not lightIsOn then
        switch:RotateTo(onRotation, 0.5, true)
        World.SpawnAsset(propLightTemplate, {position = bulbPosition})
    end

    lightIsOn = not lightIsOn
end
Test the If-Statement
Press Play and make sure everything still works.
A light should have spawned every other time you interacted with the switch, instead of every time. The light is only spawning when lightIsOn is false. Progress!
Turn the Switch Back Off
The next step is to tell the script to turn the switch downwards when the light is off. The else keyword will allow you code what should happen if lightIsOn is not false.
Fortunately, you have already saved a variable for the rotation of the switch, offRotation. Add this line after right before the end line in the if statement of the OnSwitchInteraction function:
    else
        switch:RotateTo(offRotation, 0.5, true)
elseis used withifto tell the script if the if conditions are not true, do the following instead.switch:RotateTo()tells the script to rotate our switch variable. The switch needs to rotate to its original downwards position, since we defined its initial rotation asswitchStartingRotation, we can simply plugswitchStartingRotationinto our rotation statement.0.5is the time in seconds it takes to complete the action.
Your OnSwitchInteraction() function should now look like this:
local function OnSwitchInteraction()
    if not lightIsOn then
        switch:RotateTo(onRotation, 0.5, true)
        World.SpawnAsset(propLightTemplate, {position = bulbPosition})
    else
        switch:RotateTo(offRotation, 0.5, true)
    end

    lightIsOn = not lightIsOn
end
Press Play to see if your else statement works. The switch should now rotate up when first interacted with, then down on your second interaction with it. However, we still need to de-spawn (delete) the light when the light switch is turned off.
Turning the Light Off
Make a Variable for the Spawned Light
In order to turn off the light, you first need to define the light after it is spawned. When the LightTemplate is spawned, it shows up at the bottom of the Hierarchy. Make a variable to reference this at the top of the script:
local spawnedLight = nil
spawnedLightis the name you are giving to the light that spawns.nilmeans that it has no value yet.
Next, in the line where you spawn the light, assign what is spawned to the variable, by adding spawnedLight = to the beginning:
spawnedLight = World.SpawnAsset(propLightTemplate, {position = bulbPosition})
World.SpawnAssetis doing two different things here. It creates the asset in the game space, and also returns the unique ID of the asset that just got spawned, which you are saving to the variablespawnedLight.
Destroy the Light
Now that you have defined our spawned light, you can tell the script to destroy it when the switch is turned off. In the else section, add:
spawnedLight:Destroy()
spawnedLightis the variable we just defined representing the Point Light spawned when the light switch is turned on.Destroy()is a function used to delete objects from a scene.
Your OnSwitchInteraction() function should now look like this:
-- Function to rotate the switch
-- and spawn the light
local function OnSwitchInteraction()
    if not lightIsOn then
        -- move the switch up and create the light
        switch:RotateTo(onRotation, 0.5, true)
        spawnedLight = World.SpawnAsset(propLightTemplate, {position = bulbPosition})
    else
        -- move the switch down and destroy the light
        switch:RotateTo(offRotation, 0.5, true)
        spawnedLight:Destroy()
    end

    -- track whether the light is on or off
    lightIsOn = not lightIsOn
end
Notice the comments describing the OnSwitchInteraction() function. If statements are an excellent place for comments, because they allow you to describe the logic of what should happen, before anyone even looks at the code.
Test Turning off the Light
Save and press Play to test the latest changes. The lightbulb should illuminate when the switch is up, and be dark when the switch is down.
Updating Interaction Labels
Right now, the light switch trigger always says Turn on Light. You can add more polish to a project by changing the interaction label based on what it should do each time.
There are two ways to change a trigger's label, by going to the trigger's Properties and editing the Interaction Label field, or with a script.
Change the Interact Label to "Turn off Light"
Before the OnSwitchInteraction function, add this line
switchTrigger.interactionLabel = "Turn off Light"
switchTriggeris the name of the trigger we are editing the label of.interactionLabelis the property of the trigger we are editing."Turn off Light"is a text string, basically what the label will say.=is an assignment, meaning we are setting a property to what comes afterwards
Test the Label Change
Press Play and check label changed from Turn on Light to Turn off Light as soon as the scene loads.
Make a Label Changing Function
Now we just need to create a function that updates the label based on whether the light is on or off. Around your interactionLabel statement, add the following:
-- Update light switch's label
local function UpdateLabel()
    switchTrigger.interactionLabel = "Turn off Light"
end
Be sure to indent the code with Tab when it is moved into a function!
Your entire LightToggleScript should now look like this:
local spawnedLight = nil

local lightBulbFolder = script:FindAncestorByName("Lightbulb & Switch")

local bulb = lightBulbFolder:FindDescendantByName("Bulb")
local bulbPosition = bulb:GetWorldPosition()

local propLightTemplate = script:GetCustomProperty("LightTemplate")

local switch = script.parent
local switchTrigger = switch:FindChildByName("Trigger")

local onRotation = Rotation.New(0, -60, -0)
local offRotation = Rotation.New(-180, -60, 180)

-- Change the label on the trigger
local function UpdateLabel()
 switchTrigger.interactionLabel = "Turn off Light"
end

-- Function to rotate the switch
-- and spawn the light
local function OnSwitchInteraction()
    if not lightIsOn then
        switch:RotateTo(onRotation, 0.5, true)
        spawnedLight = World.SpawnAsset(propLightTemplate, {position = bulbPosition})
    else
        switch:RotateTo(offRotation, 0.5, true)
        spawnedLight:Destroy()
    end

    lightIsOn = not lightIsOn
end

-- Connect the function to the trigger event
switchTrigger.interactedEvent:Connect(OnSwitchInteraction)
Call the Function
If you press Play now, the interaction label will not change. This is because the line of code changing the label to Turn off Light is now in a function that isn't called on in the script. The script won't run the function until we tell it to. Right now we have only defined what the function does, but we haven't told the script when to run it.
At the bottom of the OnSwitchInteraction function, before the end keyword, add this line to call the function:
UpdateLabel()
Press Play. The label should change to Turn off Light when you interact with the switch
Switch the Label from On to Off
To change the label from Turn on Light to Turn Off based on if the light is on or not you will use an if statement. In the UpdateLabel() function write:
if lightIsOn == false then

end
if ... thenis the syntax needed for ourifstatement.lightIsOn == falseis the condition that must be met in order to execute theifstatement. This is the same as writingnot lightIsOnendmeans theifstatement is done.
If lightIsOn is set to true, that means the light is off - so our interaction label should say Turn on Light. Cut and paste the interactionLabel line into this if statement. Now the UpdateLabel() function should look like this:
local function UpdateLabel()
    if lightIsOn == false then
        switchTrigger.interactionLabel = "Turn on Light"
    end
end
Switch the Interaction Label from Off to On
The script still doesn't say what to do when the light is on. Let's add another interactionLabel assignment that makes it say Turn off Light and an else condition to our if statement. Under the Turn on Light interactionLabel statement and before the end line, type:
else
    switchTrigger.interactionLabel = "Turn off Light"
Any time lightIsOn is not equal to false, the label will say Turn off Light. The whole function should look like this now:
local function UpdateLabel()
    if lightIsOn == false then
        switchTrigger.interactionLabel = "Turn On"
    else
        switchTrigger.interactionLabel = "Turn Off"
    end
end
Test the Label Switch
Your onSwitchInteraction function should look like this now:
-- Function to rotate the switch
-- and spawn the light
local function OnSwitchInteraction()
    if not lightIsOn then
        switch:RotateTo(onRotation, 0.5, true)
        spawnedLight = World.SpawnAsset(propLightTemplate, {position = bulbPosition})
    else
        switch:RotateTo(offRotation, 0.5, true)
        spawnedLight:Destroy()
    end

    lightIsOn = not lightIsOn
    UpdateLabel()
end
Press Play. Now the label should update every time you interact with the light switch!
Summary
You have now learned how a script can move and interact with objects within your scene using triggers and custom properties. You have also use programming structures like functions and if statements. Now you can start designing and coding interactions for your own games!
Finished Script
local spawnedLight = nil

local lightBulbFolder = script:FindAncestorByName("Lightbulb & Switch")

local bulb = lightBulbFolder:FindDescendantByName("Bulb")
local bulbPosition = bulb:GetWorldPosition()

local propLightTemplate = script:GetCustomProperty("LightTemplate")

local switch = script.parent
local switchTrigger = switch:FindChildByName("Trigger")

local onRotation = Rotation.New(0, -60, -0)
local offRotation = Rotation.New(-180, -60, 180)

-- Change the label on the trigger
local function UpdateLabel()
    if lightIsOn == false then
        switchTrigger.interactionLabel = "Turn On"
    else
        switchTrigger.interactionLabel = "Turn Off"
    end
end

-- Function to rotate the switch
-- and spawn the light
local function OnSwitchInteraction()
    if not lightIsOn then
        switch:RotateTo(onRotation, 0.5, true)
        spawnedLight = World.SpawnAsset(propLightTemplate, {position = bulbPosition})
    else
        switch:RotateTo(offRotation, 0.5, true)
        spawnedLight:Destroy()
    end

    lightIsOn = not lightIsOn
    UpdateLabel()
end

-- Connect the function to the trigger event
switchTrigger.interactedEvent:Connect(OnSwitchInteraction)
Learn More
Scripting in Core | Core API | Intro to Lua Course